How To Unbox A Crate Engine
So you got a new Chevrolet crate engine Congratulations! Now what? The first thing you need to do when you receive it is to unbox it.
What Does It Mean To Unbox A Crate Engine?
Unboxing a crate engine is pretty self explanatory. It’s the process of taking the engine out of the box when you receive it. It’s not like unboxing a pair of shoes, though. Unboxing a crate engine sounds simple in concept, but it’s a whole process that needs to be done right.
Why Is It Important To Unbox A Crate Engine The Right Way?
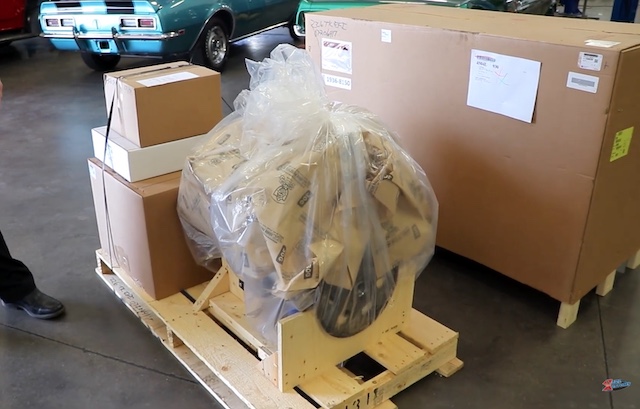
Unboxing a crate engine the right way:
- Keeps the crate intact
- Eliminates the risk of the engine or anything else getting damaged during the unboxing process
Let’s say you find any issues with the engine, or there are some pieces missing. You would need to return any or all of the products to us. You want the crate to remain intact to make the returning process so much easier. If you unbox the crate engine the right way, you can just put the top half back on, bolt it in, and you’d be good to go.
You would also get full credit. You could return your engine with a damaged crate and still get credit. Yet, you wouldn’t get full credit. If the top half of the crate is still in good shape (along with everything else), you’ll get full credit.
Unboxing A Chevrolet Crate Engine The Right Way
We put together a video that walks you through the process of unboxing a Chevy crate engine the right way:
We also wrote out the steps:
1. Check The Packaging For Any Damage
Every crate engine we ship out is packaged the right way. We use new crates that are put together very securely. If you find any damage, something went wrong in the shipping process.
Before accepting the shipment, look over the box and check for damage. Look for:
- Cuts
- Dents
- Holes
- Large wet stains
- Rips
- Anything else that indicates that the box was damaged during shipping
If you find any damage, note it on the delivery receipt. Also, please take pictures in case we need them for the freight company claim.
2. Find The Invoice And Warranty Information
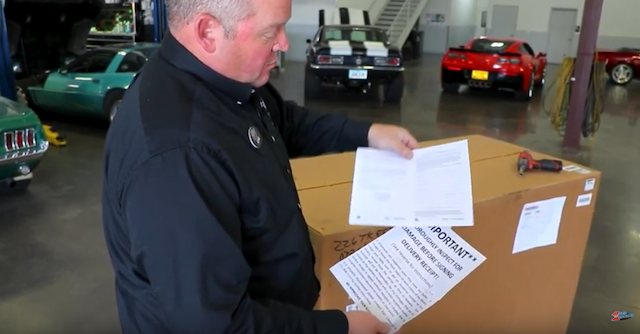
The box will come with your invoice and the warranty paperwork. The paperwork should be in a plastic sleeve affixed to the outside of the box. It’s important to review all the paperwork to make sure that you have the correct information.
3. Remove All The Lag Bolts
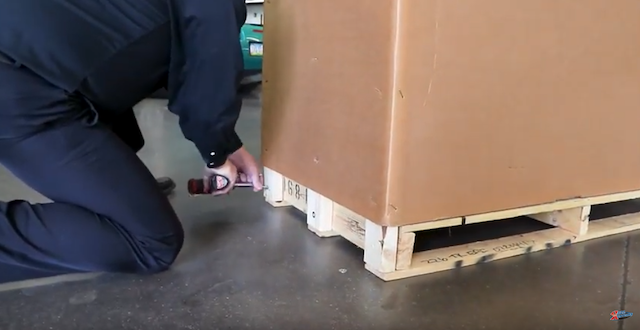
When you see a large box that’s put together with heavy duty staples, it’s tempting to grab a pry bar and start ripping them out. That’s definitely not the right way to do it. It’s because there’s a wooden frame around the engine. Also, you want the box to remain intact.
That’s why we made it easier than ever to unbox our crate engines. The way to do this is to remove all the lag bolts. There are three lag bolts at the bottom edge, on both sides. Unscrew them all.
4. Remove The Top Half Of The Crate
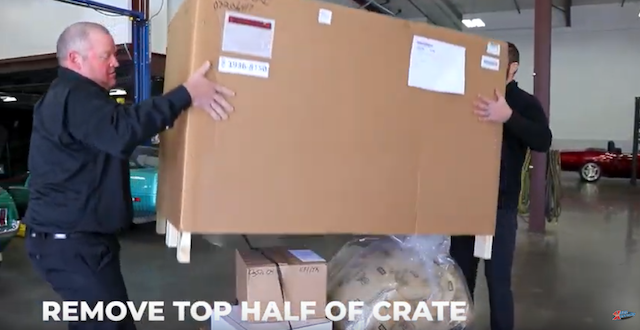
Grab a buddy and then pull up the top half of the crate. With all the lag bolts out, it should be easy to remove the top half. That’s all! Sure beats hacking away at the crate with a Sawzall, doesn’t it?
5. Do A Inventory Of Everything In The Crate
You want to make sure that everything you ordered is in the crate. There will be a sheet of paper, either taped to one of the boxes or inside it. The sheet has a list of all the parts and components within the crate. Grab the list and then carefully check everything in the crate. Make sure that no parts are missing. If there are any missing parts, please let us know.
Do you have any questions about the unboxing process? Feel free to give us a call at 866-697-8615.
